
D Fender Installation Guide
D Shaped Marine Fenders are simple to install, requiring no specialised skills. These instructions are for the Light-Weight D Fender, Heavy Duty D Fender and the D Fender With Lip.
Rubber D-Shaped Fender | Rubber Dock Bumper | Marine Fender | DD Hollow Fender
D FENDER INSTALLATION
D Shaped Marine Fenders are simple to install, requiring no specialised skills. These instructions are for the Light-Weight D Fender, Heavy Duty D Fender and the D Fender With Lip.
Please remember to employ the proper safety procedures when working in and around water and heights.
Required Equipment
-
Aluminium or Stainless Steel Fixing Strip (can be purchased at Bunnings)
-
Appropriate Fixing Screw (adjust screw type according to fixing surface)
-
Measuring Tape
-
Power Drill
Installation Instructions
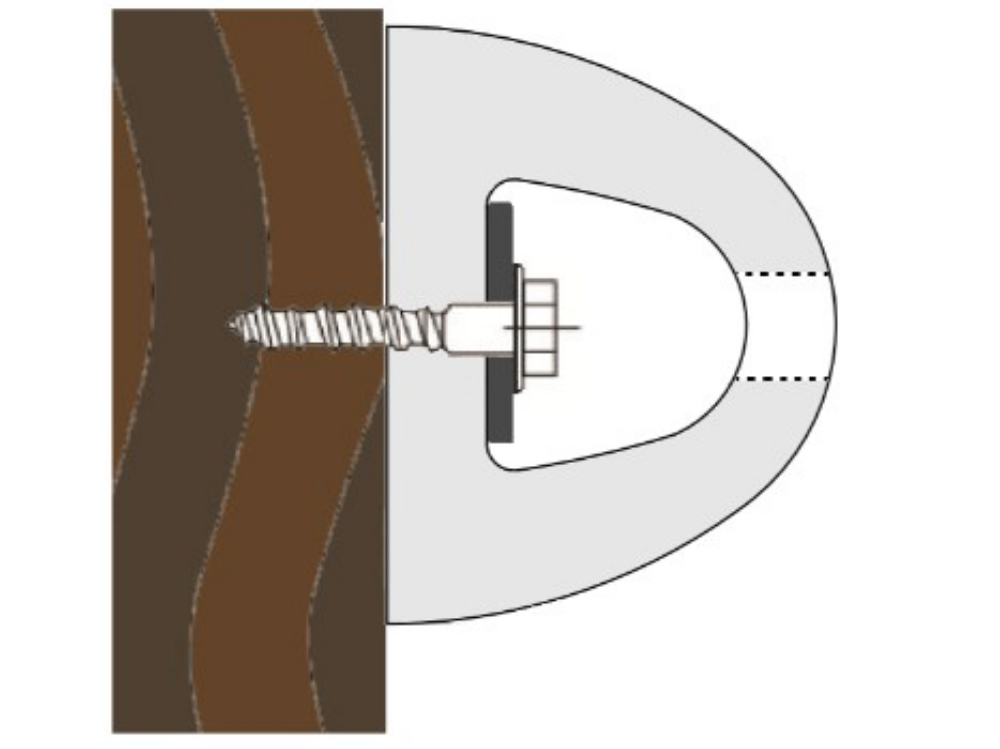
Step 1: Measure and mark the location of the guide holes at a maximum of 450mm apart (from centrelines).
Step 2: Laying the fender on a flat surface, use a power drill to drill the guide holes at the peak of the fender. Remove the drill swarf and burrs.
Step 3: Slide the aluminium/stainless steel fixing strip inside the fender along its base.
Step 4: Depending on its length, have somebody help you hold the fender in the desired position. If you are installing the D fender with lip, rest the inner edge of the lip against the top edge of the pier.
Step 5: Using a power drill, fix the screw into position.